In a previous article, we got Meta free test number and Setup Alvochat instance, If you have finished the project, and you want to launch your project, you must add your own number to work with the WhatsApp API to send & receive WhatsApp messages through it.
When you activate your number with the WhatsApp Business API, you will not be able to use the WhatsApp application from your phone.
you can add and activate a mobile number or the unified or landline number of the company.
Step 1: Add phone number
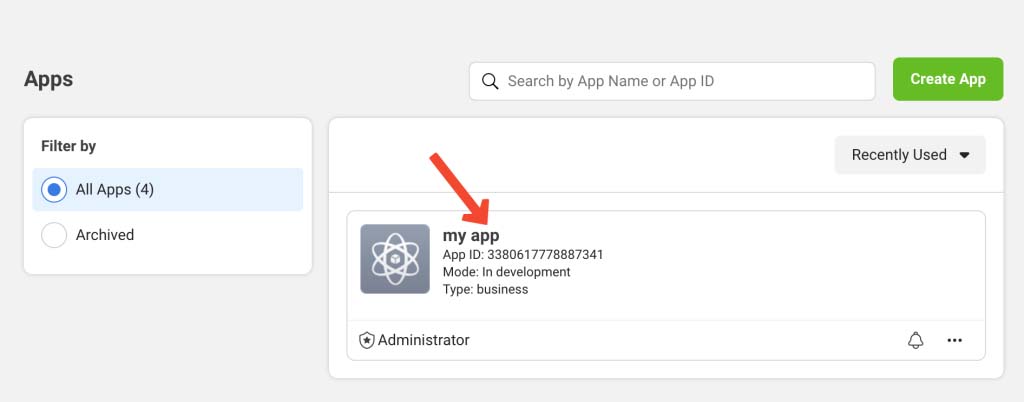
Go to your Facebook Developers account and click on your app :
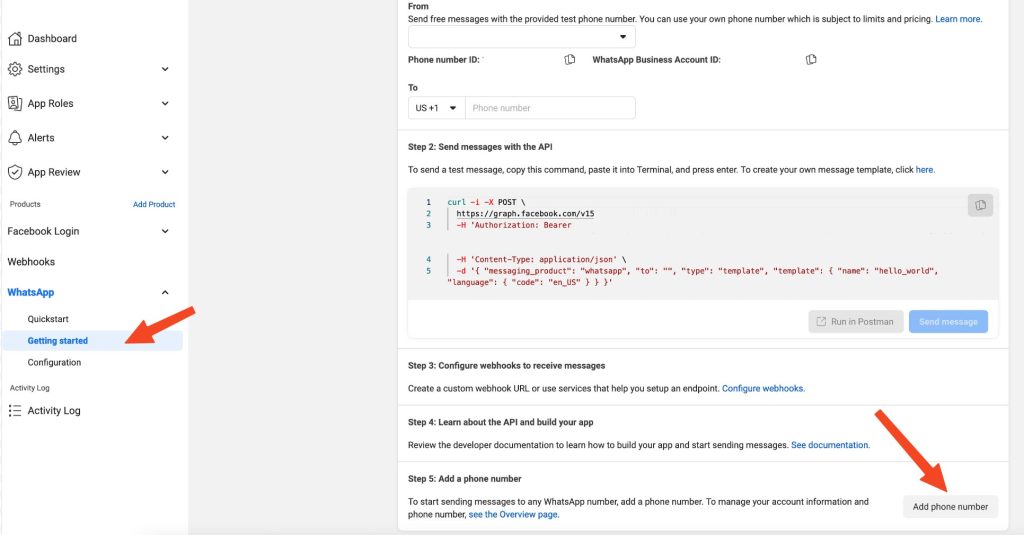
Go to Whatsapp > Getting started, and click on the “Add phone number” button.
Step 2: Add WhatsApp Business display name
Now, this window will appear :
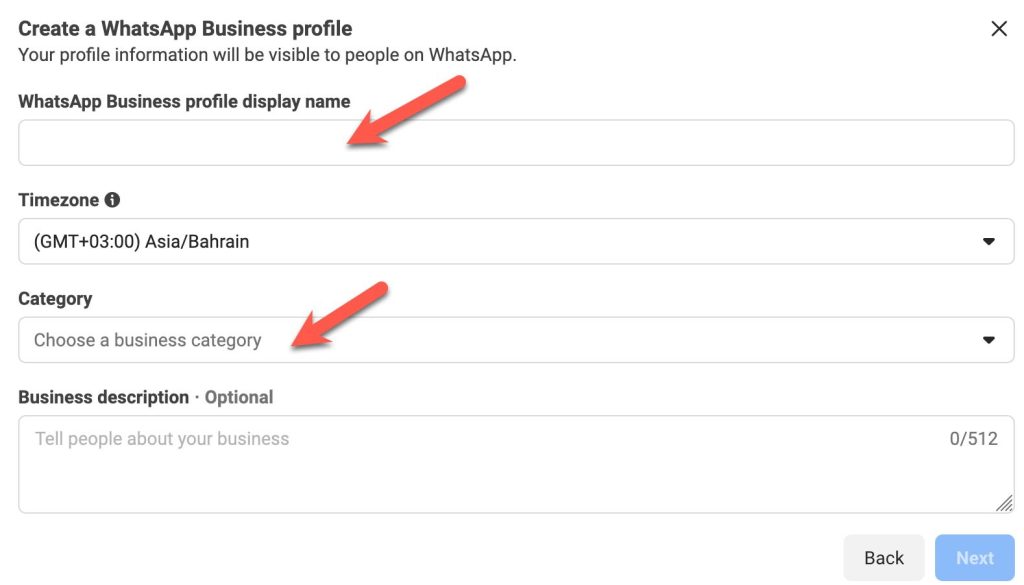
WhatsApp Business profile display name :
The WhatsApp Business display name is your business name that customers see on your WhatsApp Business profile, The name must match the name of your company registered in the business account on Facebook, or you can put your trademark, but you must have a document proving your ownership of this trademark.
Once the business verification is completed and the display names for phone numbers are approved, you can start using this number for sending and receiving WhatsApp messages.
Category:
Select a Category for your business.
Select Next to begin the phone number verification process.
Select your country code from the drop-down and enter the phone number you would like to register.
If you do not have a previously activated Facebook Business Account, Facebook will ask you for some information about your company, such as
1- Website.
2- Work E-mail.
3- The address of the company.
4- Documents (commercial register of the company, proof of address document).
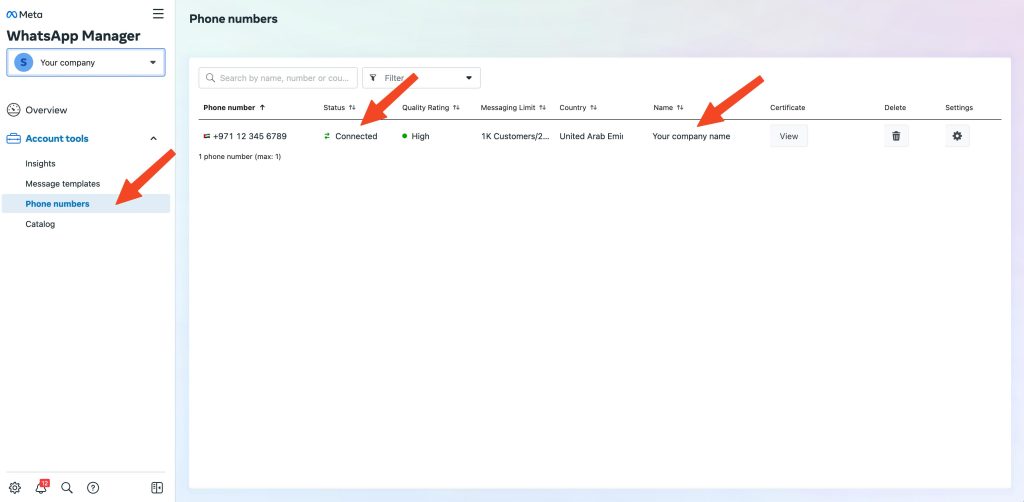
step 3: Check the status of the number before using
After Register the Phone Number and the display name Approval usually takes from 1 hour to 24 hours.
You can go to Whatsapp manage using this link to check the status of the number :
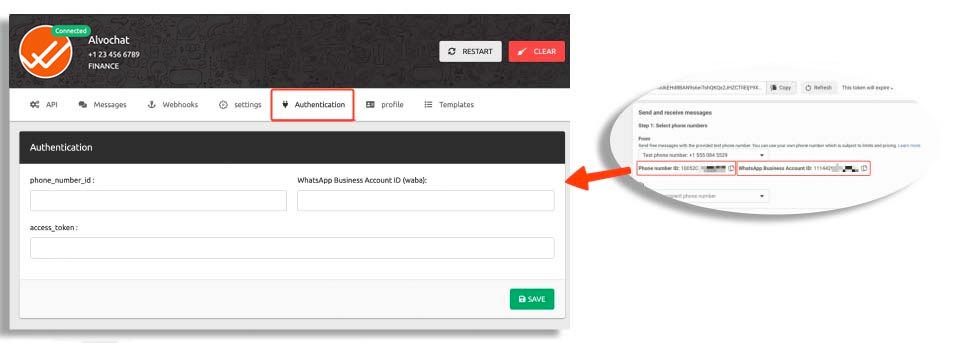
step 4: update “Phone number ID“ and “WhatsApp Business Account ID“
Go to Whatsapp > Getting started, and select your number, Now, you see the Phone number ID, and WhatsApp Business Account ID, Keep them, we will use them later.
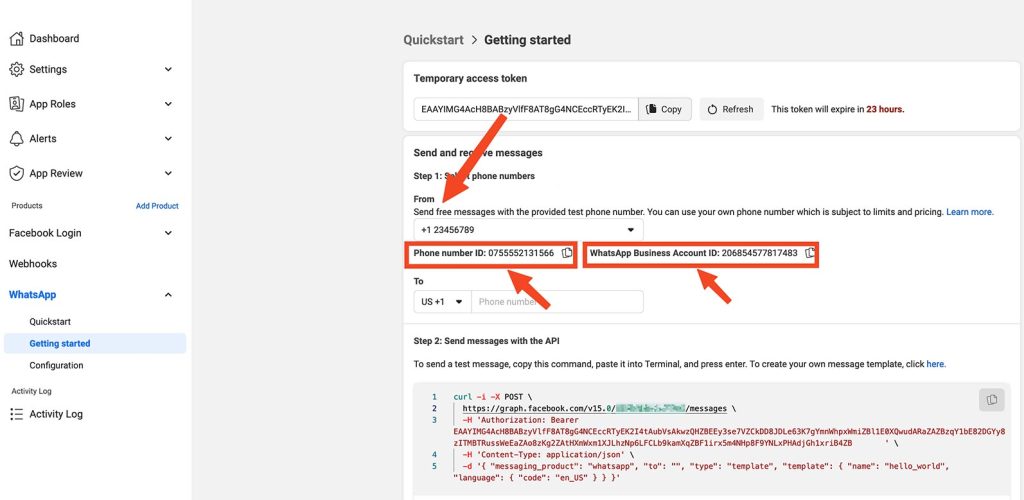
Go to your account in Alvovhat and select your instance.
Then click the “authentication” Tab and paste the “Phone number ID“, “WhatsApp Business Account ID“, and “Token” then press the “save” button