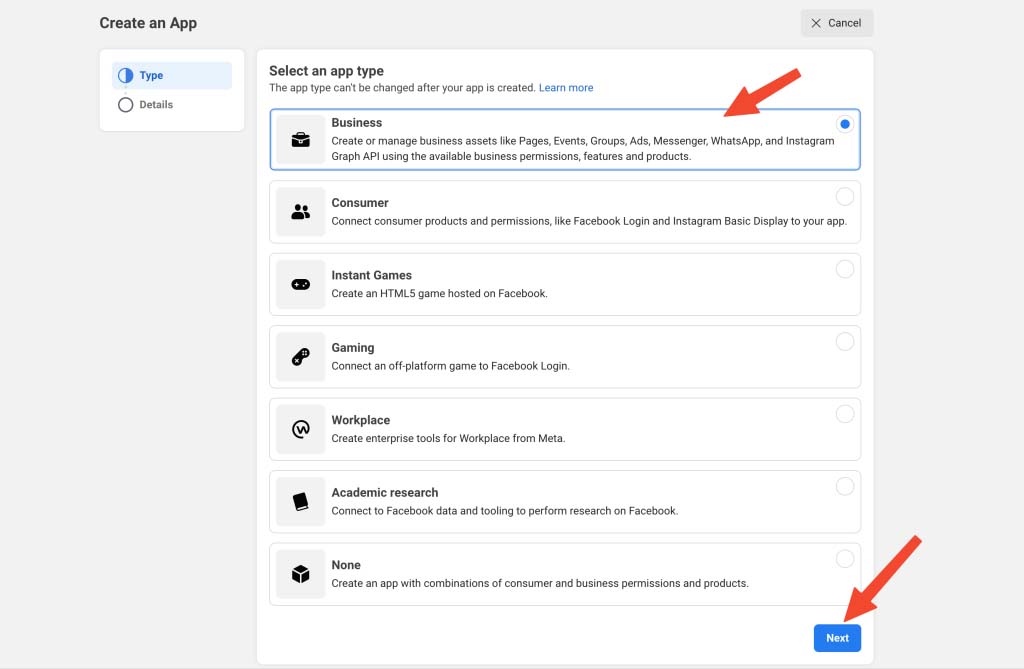
Step 1: Create a business app on Facebook
log in or Sign up to the Facebook Developers account and click on the Create App button and choose the Business type app option and then click the “next” button below.
Write your app name “just a name” and your email.

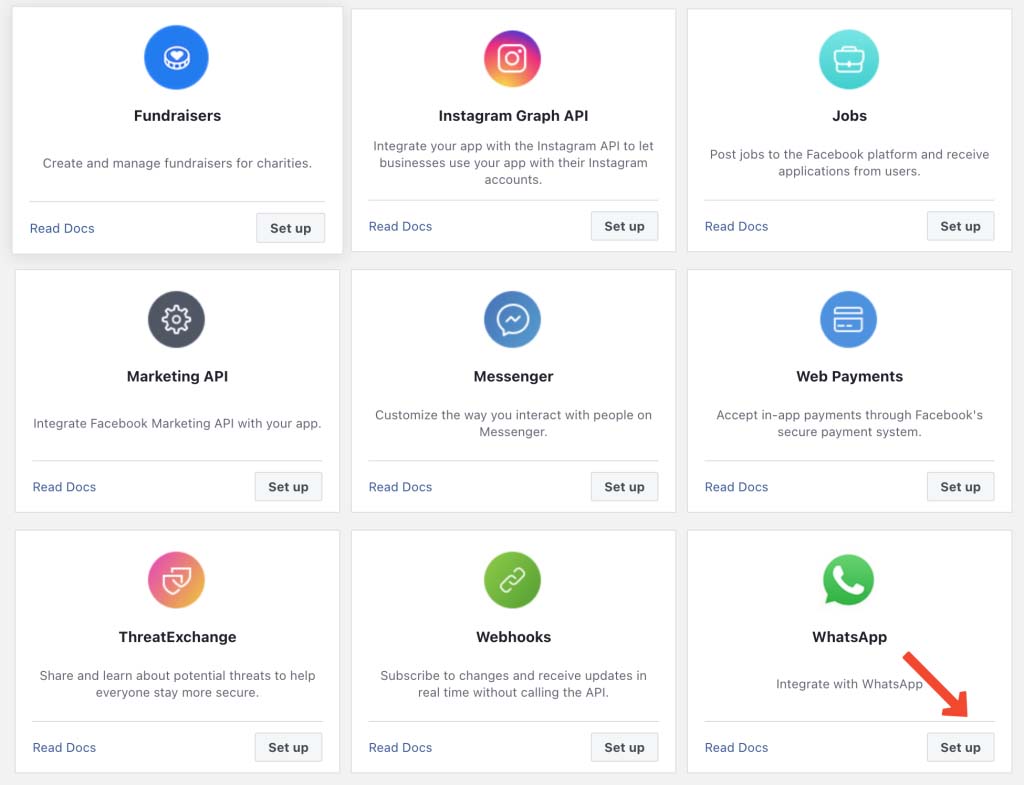
Scroll down until you see WhatsApp and click the Set up button.
Step 2: Create a business account
choose the “create a business account” option from the dropdown or if you already have a business account then you can choose an existing account. and click on the continue button.

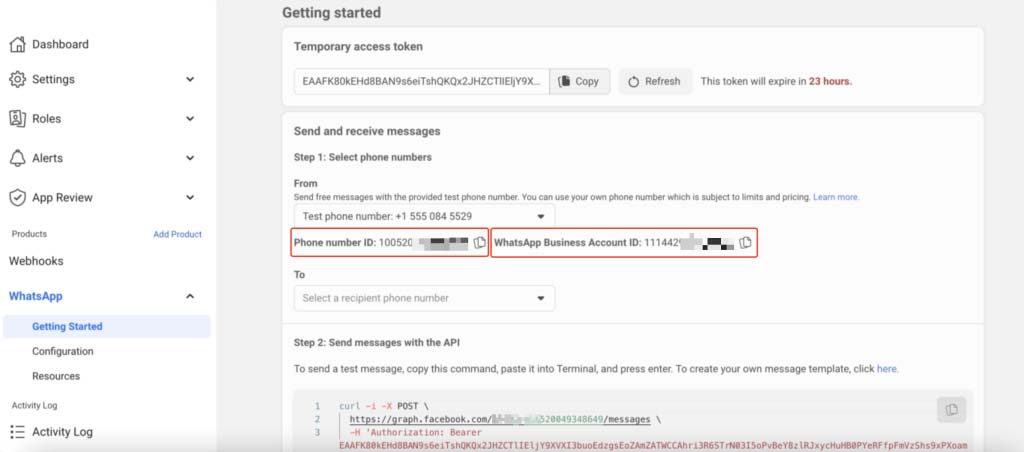
Now, you see the Phone number ID, and WhatsApp Business Account ID, Keep them, we will use them later.
Step 3: Generate a “permanent” production token
Now we need to Generate a permanent token and give Permission to the application we created in the previous steps.
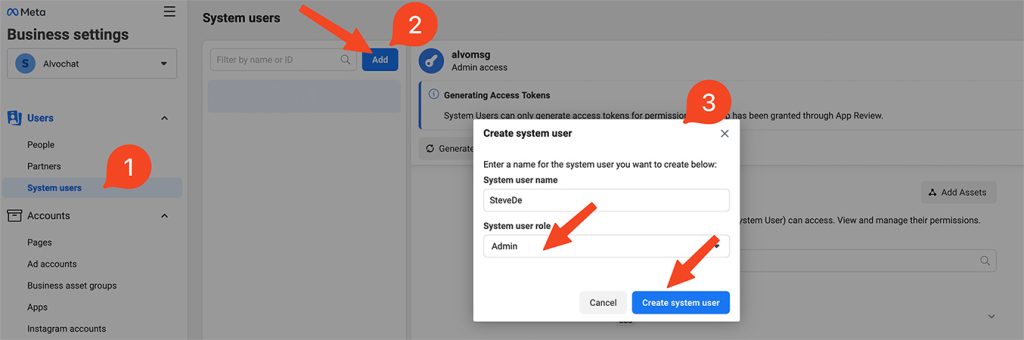
Go to Meta business settings
In Users > System users, Click on Add button to create a system user and Fill in the details such as your name and System user role as Admin :
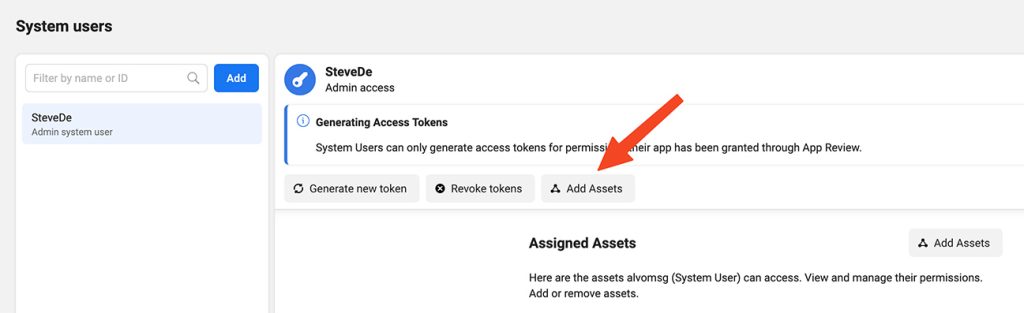
Click on Add Assets option
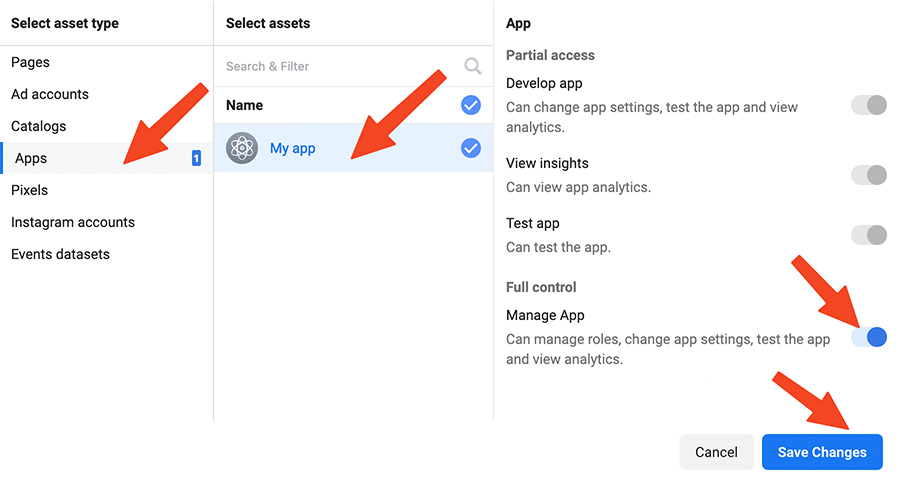
Now Select Apps > Name. Enable Manage app option and click Save changes.
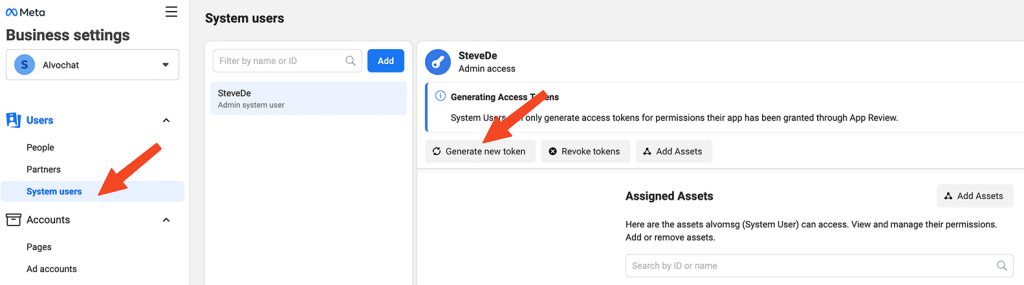
After that click on the “Generate new token” button :
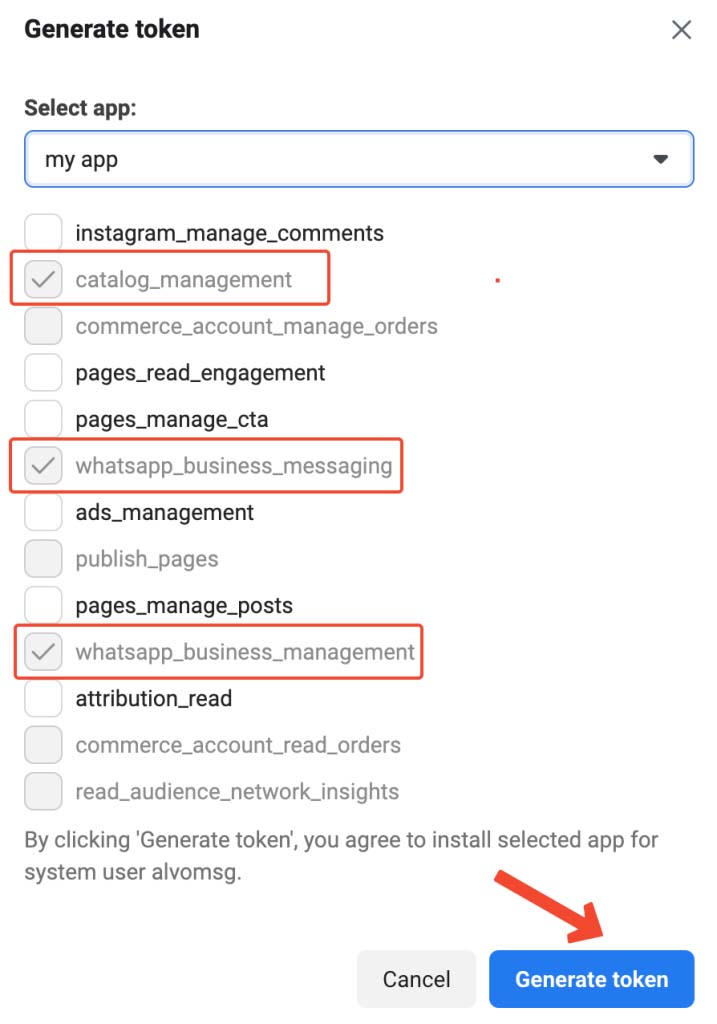
scroll the page scroll and choose the following permissions:
- catalog_management
- whatsapp_business_messaging
- whatsapp_business_management
Then click on the “Generate token” button.
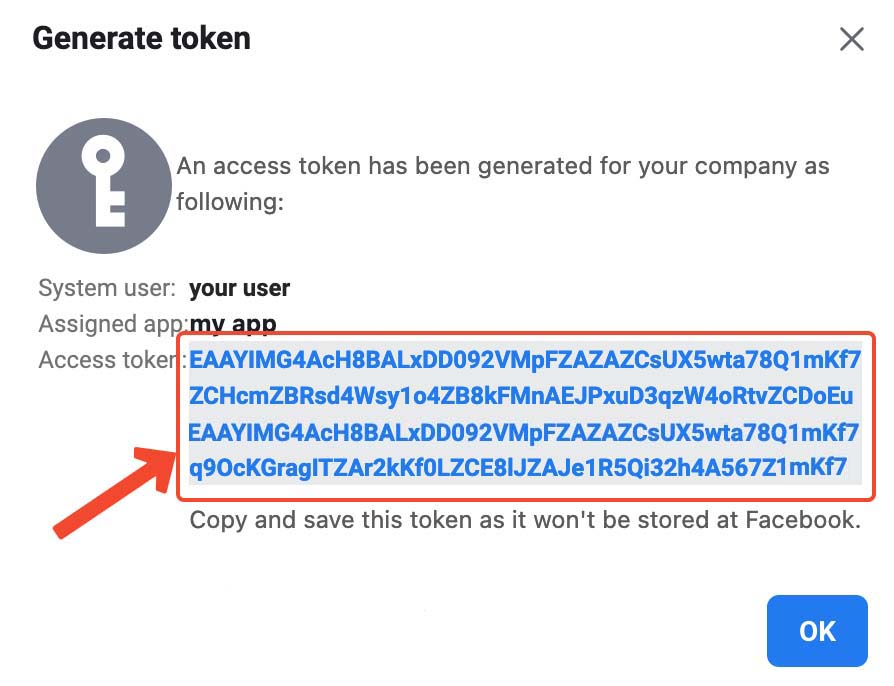
After clicking on the “Generate token” button You will see your token, copy it, and save it.
Step 4: Create authentication with your instance in Alvochat
Go to your account in Alvovhat and select your instance.
Then click the “authentication” Tab and paste the “Phone number ID“, “WhatsApp Business Account ID“, and “Token” that you got in the previous steps, then press the “save” button

Step 5: Setup the WhatsApp inbound message webhook
Now we will prepare the webhook for the WhatsApp API to work efficiently and to receive messages from customers and message statuses.
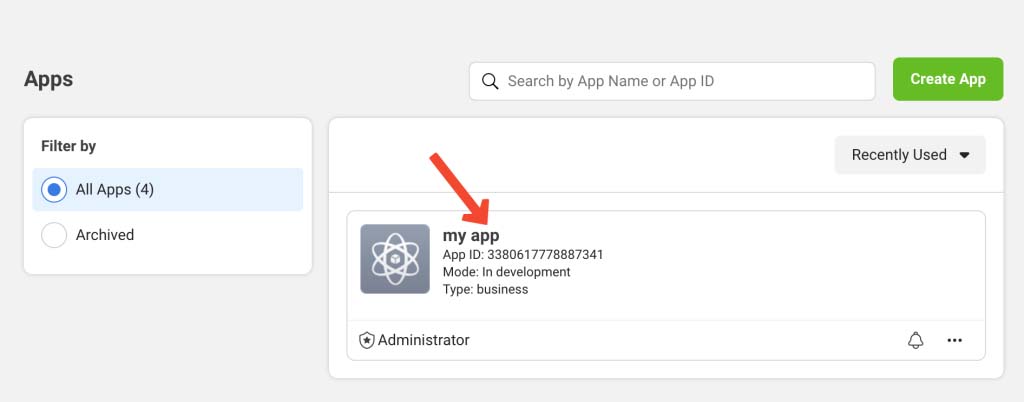
Go to your Facebook Developers account and click on your app :
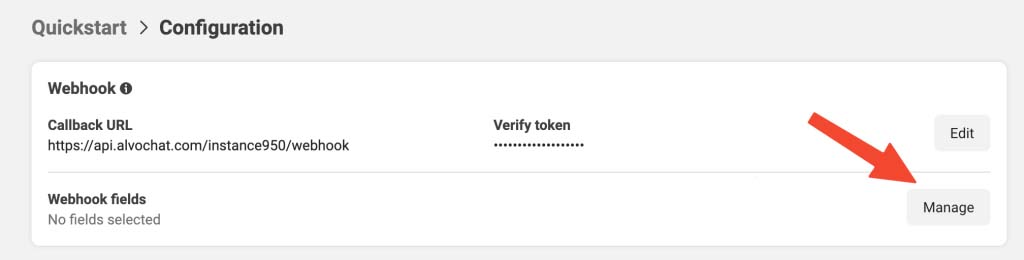
Now, Go to your account in Alvovhat and select your instance, Then click the “API” Tab and fill out the form in Facebook :
Callback URL = API URL
Verify token = Token
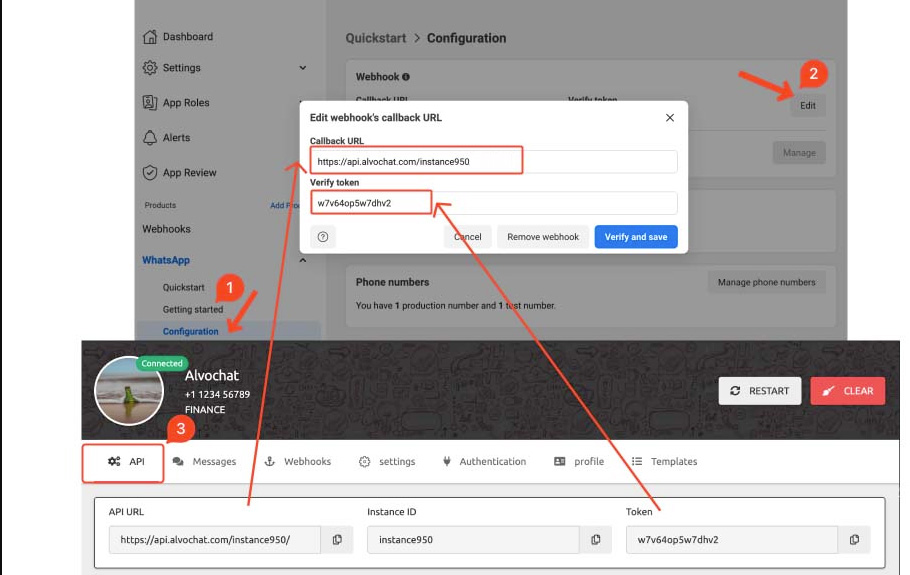
After filling out the previous form, click on the “Verify and save” button.
Now there is a step left to give Permission to the webhook, So click on the “Manage” button .
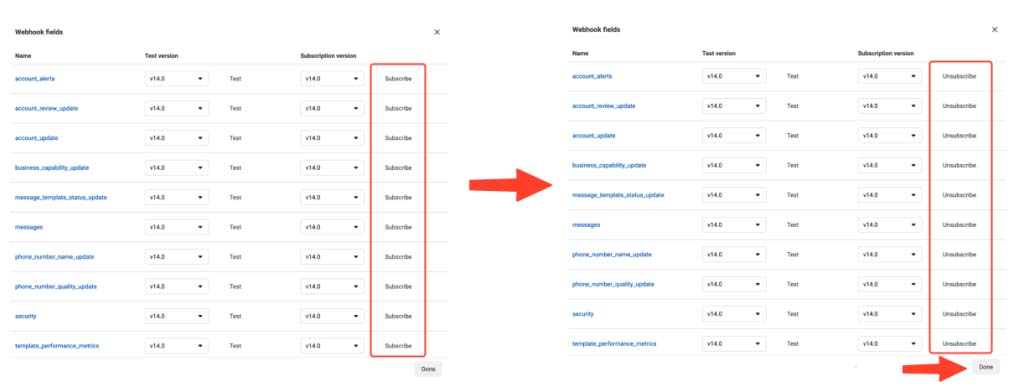
Click on all the “Subscribe” buttons then click the “Done” button :
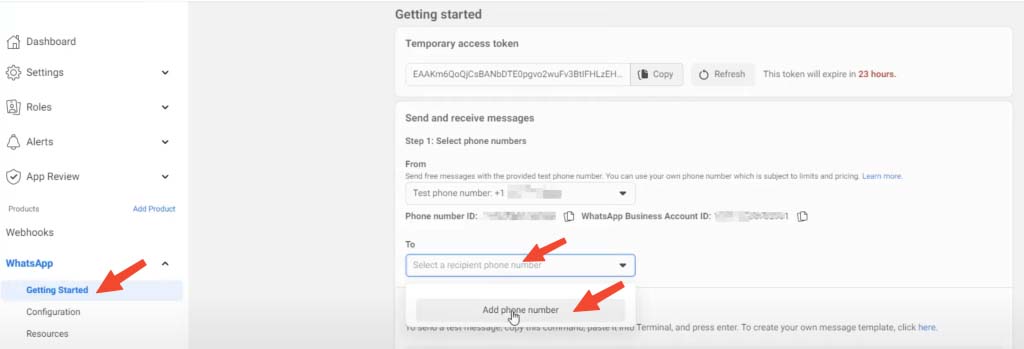
Step 6: Add your number
Now Facebook has provided you free test number to send WhatsApp API messages.
Important: test number can send and receive from only numbers in the allowed list.
to add your number to the allowed list follow these steps:
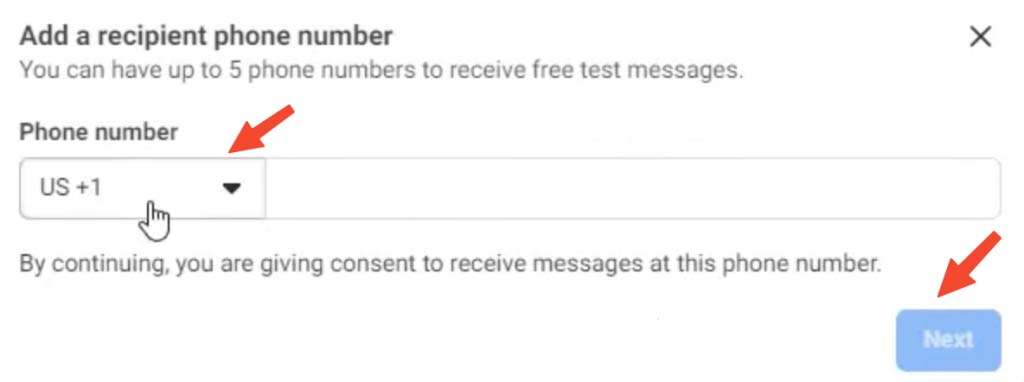
Go to Whatsapp > Getting started As in step 5, and click on the “Add phone number” button.
Now Enter your number and then you will receive a text message to activate.
Note : test number cannot use it for the production , Because it sends WhatsApp messages to your number only.
congratulations Done 🎉
Now you can go to your account in Alvochat To start sending and receiving WhatsApp messages API.